Creating an icon file is easy. All you need is a icon editing software. In this post I will show you how to create icon using Sib Icon Editor which can be downloaded and used free of charge. You can find the download link at the end of this page.
To create an icon using Sib Icon Editor, follow the steps below.
- Start the Sib Icon Editor program.
- In most cases, you will want to create icon from photo or prepared image from another image editing program. We will click on "Create a new icon from image file" in this step and choose your image.

- The image will be imported. You can configure some parameters of the generated icon in this step.
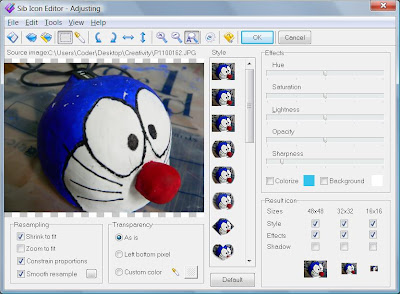
- You can do some further editing. When you're done, click on the File menu and Save as... to save your icon file.

- The icon files created from the program will have .ICO as extension.


You can now use the icon created anywhere you want : )
Related Pages:
- Download Sib Icon Editor - http://www.sibcode.com/icon-editor/index.htm
1 comment:
Thanks for the info. Quick little how-to's and article like this are a massive help and I hope you continue to make additional contributions.
Post a Comment